Haig's House
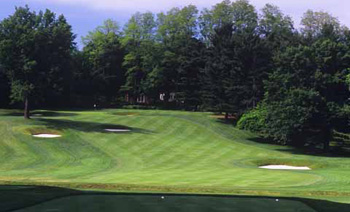
HOLE #1

Description: Some might say the first hole is a 'mere' 324 yards. However, the opening 324 yards serves to welcome you to the quality of golf that you will find during your round. The first hole epitomizes classic golf design by allowing the golfer to choose their path to the hole. The bold play is rewarded, only if it is struck with accuracy and confidence.
Pro's Advice: The golfer chasing par might choose to hit a long iron off the tee, positioning themselves between the fairway bunkers for an uphill second shot. A more aggressive play is with the driver. If you are able to find the fairway with the driver, you are left with a short iron to a well-bunkered green that slopes from right to left.
Hole 1Buckland Burn
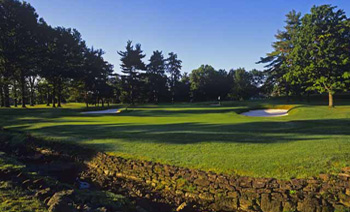
HOLE #2

Description: The Second hole is a classic par 5, asking the golfer to consider the timeless debate between risk and reward.
Pro's Advice: The best shot off the tee is a slight fade, protecting against the fairway bunker on the right. A well struck tee-shot gives one the opportunity to reach the green in two. However, one must take care with this shot. The second shot must carry a creek, and find its way between the bunkers, which protect the left, right, and front of the green. If the play is to lay up, then the third shot must be struck with precision. If your approach finds the wrong side of the hole location, simply two-putting can be a devilishly tricky task.
Hole 2Elmwood Hill
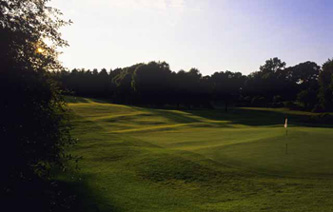
HOLE #3
Description: One of the best short par-4's that you will find anywhere, the golfer must well-consider their route on this hole. This hole is all about position and strategy. The second shot is significantly uphill. So much so that only the top half the flagstick is visible from the fairway. Well-positioned bunkers guard the right front and left side of the green. If your ball happens to wander above the hole, it is not uncommon to be chipping on your next shot.
Pro's Advice: A well reasoned tee-shot is to the right half of the fairway, staying short of the fairway bunker. This leaves the player a difficult, yet manageable play into the green.
Hole 3Overlook
HOLE #4
Description: A true test of a golfer's skill, this well-framed, downhill par-3 requires a long and accurately struck shot. The golfer's aim must be true, for cavernous bunkers on the left and right of the green gobble up wayward shots.
Pro's Advice: The approach must be struck crisply enough to carry a creek about 25 yards short of the putting surface.
Hole 4Slopes
HOLE #5

Description: A most challenging par-4, this hole tests the golfer from beginning to end. The tee shot facing the golfer is tremendously challenging, for the hole turns from right to left on a fairway which slopes left to right. The tee is well sheltered amongst the trees giving the player the sensation of hitting through a chute. Just hitting the green doesn't end the test. The well-contoured green affords a myriad of three-putt opportunities. A great challenge from beginning to end.
Pro's Advice: A nice draw will hold the fairway affording the player the opportunity to test their abilities playing from a lie with the fairway falling away.
Hole 5Wilbur's Elbow
HOLE #6
Description: If the golfer is beginning to feel a little taxed...just wait. The sixth is a sharp dogleg to the right, with bunkers guarding both the inside and outside corners of the dogleg. A strong, aggressive player can try to cut the inside corner, but the ever present pine trees will snatch any tee shot which is a little off line.
Pro's Advice: A conservative play off the tee leaves a long iron or even a fairway wood into a green well framed by bunkers.
Hole 6Waterloo
HOLE #7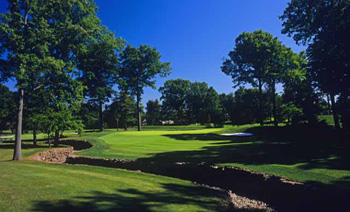
Description: The seventh is just a big, brawny par-3 that will knock the rust off your long irons. Enough said. Hole 7
Ross Redux
HOLE #8

Description: The eighth is a beautifully framed par-4. The tee is somewhat tucked in a stand of trees, but opens up into a generous landing area. A lone tree in the left rough balances a bunker off the right fairway. The approach shot is slightly uphill to a narrow green with bunkers swallowing any off-line shots. A beautiful golf hole.
Polo Field
HOLE #9
Description: The ninth plays as a par-5 for the women and a par-4 1/2 for the men. The tee shot is straightaway and slightly uphill. There is a bunker on the inside right corner of the dogleg, which is there to taunt all but the biggest of hitters. There are bunkers short, right of the green which disguise the depth required of the approach shot. Hole 9
Double Back
HOLE #10
Description: You're a long way from home when you begin the back nine, and begin the back with a great driving hole. Out-of-bound stakes come in quickly on the right close to the bunkers that guard the corner of the dogleg. Trees stand at attention along the left side of the fairway. After conquering the tee shot, laying-up requires precision and planning, with trees following the contour of the left side and those dreaded white stakes down the right. Bunkers extend from the right side of the green to catch any careless shots. Hole 10
Break Beware
HOLE #11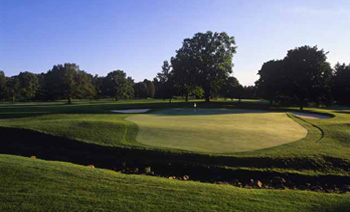
Description: The eleventh re-crosses Allen's Creek and will catch any miss hit tee shots. Accuracy is also required on approaches into this left to right sloping green, with a large bunker on the left and two smaller ones on the right. Hole 11
Point Proved
HOLE #12
Description: The twelfth plays slightly longer due to the uphill grade of the hole. The fairway slopes to the right enhancing any big fades. Two fairway bunkers down the left side gobble-up any chances for par.
Pro's Advice: Take care to select a little extra club, for the approach plays deceptively uphill.
Hole 12Crest
HOLE #13
Description: The thirteenth is another beautifully framed hole. The tee shot is just a touch uphill and then the hole gently turns to the right. The ideal tee shot gets to the top of the rise. The golfer is then left with a long iron or fairway wood from the peak of the hill. From that vantage point, the player has a great look into the green knowing exactly what is expected before the shot is struck. Hole 13
Stonewall
HOLE #14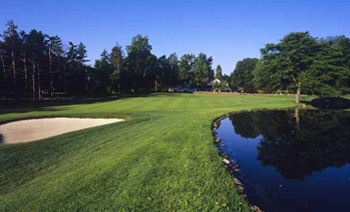
Description: The challenging, uphill par-3 plays to a slightly larger green, which allows the hole location to appear hidden at times. The hole borders the property, with out-of-bounds running along the left and continuing behind the green. A cavernous bunker cuts in on the left edge of the green. Bunkers and a water hazard protect the right side. Hole 14
Headin' Home
HOLE #15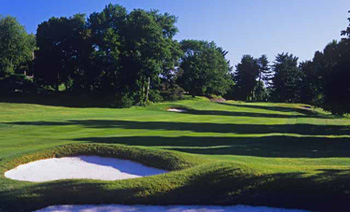
Description: The par-5 fifteenth does not surrender very easily, despite the yardage. The hole maintains a constant uphill slope to a small green. When attempting to get home in two, the aggressive player must contend with a rock wall and out-of-bounds on the left. The green falls sharply away to the right, and with it, any chance for birdies, and maybe even par, if your approach heads that direction.
Pro's Advice: The player must steer clear of the large fairway bunker on the right to maintain any hope of getting on in two.
Hole 15Gem
HOLE #16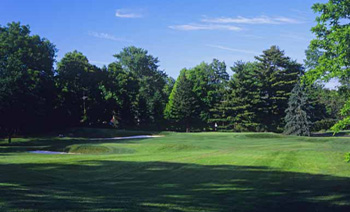
Description: The sixteenth is one of the most attractive short par-3's you will ever see. The tee is somewhat sheltered in the trees, and the green sits slightly lower than the teeing ground. The green is small and extremely well guarded with four bunkers well positioned around the putting surface. The sixteenth is a great test of a golfer's accuracy with a short iron. If a player doesn't hit the green, then they will have to muster up their entire short game prowess to save par. Hole 16
Firehouse
HOLE #17
Description: Once you cross the road and head to the seventeenth it's no time to let up. The seventeenth is a subtle dogleg to the left, with par-eating bunkers on the left. The green is open in front, so a wayward tee shot can be run up to the green. The seventeenth is a solid par-4, with a premium on accuracy off the tee. Hole 17
Homestead
HOLE #18
Description: The eighteenth is another hole, which begs to challenge the big hitters, and tests the all-around game of mere mortals. The eighteenth is a dogleg, right to left, with a sizable bunker guarding the inside corner. A strong, aggressive player may challenge the bunker in the right wind conditions. But, the prudent play is to the right of the bunker, where the fairway is lush and ample. The clubhouse is the backdrop for the deceptive approach shot. It seems to play longer, and the green is contoured in a manner that makes it easy to hide the flagstick. The eighteenth hole tests the accuracy and decision-making of the golfer. It is a fine culmination to a round, which tests these qualities and the measure of golfers' ability. Hole 18